The inspiration for this tutorial was found on Etsy. The font pictured below is half leopard print / half solid-colored font. If you've recently been on Etsy or DesignBundles, I'm sure you've seen something similar. This is a quite popular design element and there are several variations available. With a little help from the Silhouette Studio software, you can easily use any pattern you like and create a fun, one of a kind customized font.

--First choose the font you want to use and type out the words you want to use. Here I have chosen the word CRAFT. The font I’m using for this example is Arial.

--Next using the knife tool, making sure it is set to solid
line and straight, cut each letter in half. Remember if you hold your shift key
down when using the tool it will cut in either direction, in a straight line
and not on an angle.


--Once you have each letter cut, you will want to start filling in the pieces with your fill pattern and solid color(s). Solid color fills and pattern fills can be found in the Fill Panel (right hand side of software screen 3rd icon down) – first and third tabs within the panel.

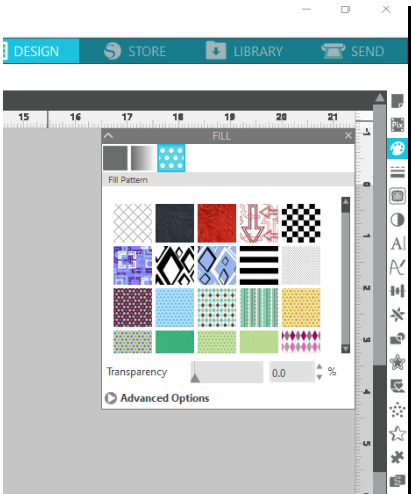
--Now choose a fill pattern and begin filling the letter pieces with the pattern. If you do not have a pattern you want to use, then you will need to acquire a pattern and import it into the patterns folder in the library within the Studio software. I got mine from DesignBundles. You can grab it here.

--Then choose a solid color you want to use and fill the remainder of the pieces with this solid color(s).

--Once all your letter pieces are filled in, decide if you will be printing this design out for use as a sublimation transfer or another printable product. If this is what you are planning to do with your design, change your line color to no color. This option can be found in the Line Style
Panel (right hand side of software screen 4th icon down / Line color - 2nd
tab). By default, the lines are colored red to represent cut lines and will print red if the line color is left as the default.
If you are not
going to be printing the design and plan to use heat transfer vinyl
(HTV) or another media that will be cut, leave your line color as is.

If you are ready to print your design – Hit the print icon and chose your printer of choice.

--If you are going to cut your design from HTV or another media – place your material choice for the pattern pieces on the mat securely and load your mat accordingly. Choose the Send Panel – 4th icon top of software screen. Then chose Fill tab (3rd tab choice) to cut the design by the pattern & solid.

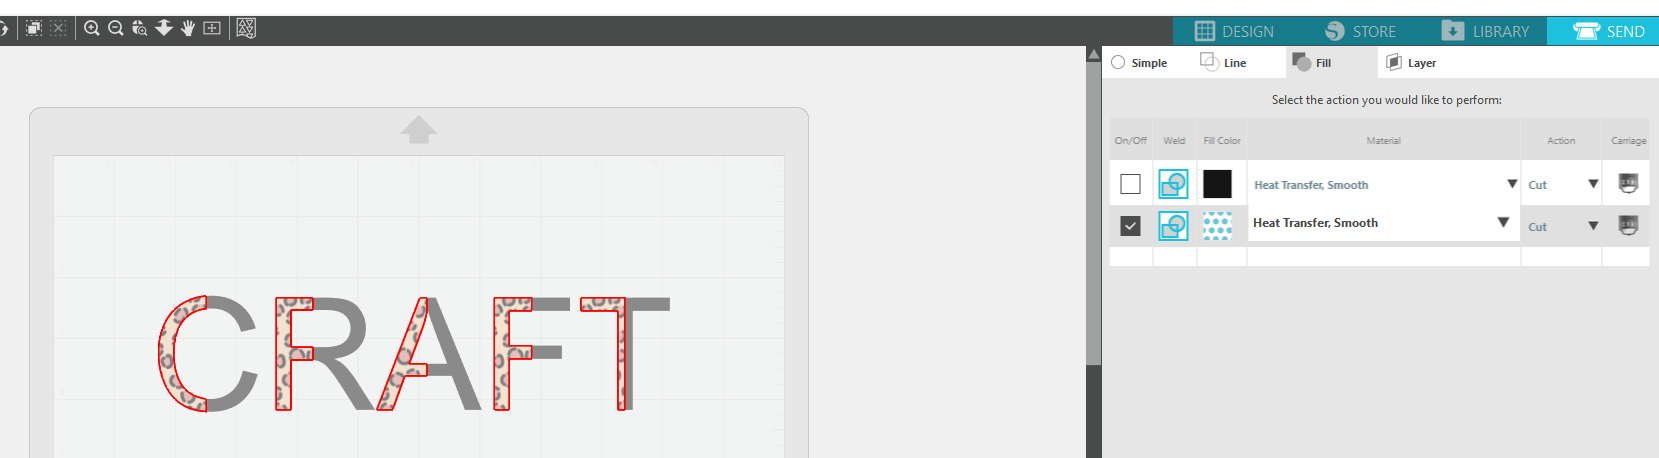

Now
hit the send button again. Once your design has completed cutting, you are ready to
press your design accordingly.
Guess what??!! You
just created your own customized lettering!
Thanks for stopping by. I hope you
found this tutorial helpful. Please feel free to contact me if you have any
questions or need additional information.
If you like this post, please share it with a crafty friend and please share it on
Pinterest, so others can find it. If you are on Facebook, I would love for you to check out my page and join my
facebook group!
In the FB group I like to share freebies, tutorials, and help with troubleshooting, etc. The group's members are super nice and like minded. We all really enjoy fellowing and crafting fun. Hope to see you there!
Until the
next time we meet. Happy Crafting!
Julie 💕
This post
may contain affiliate advertising. What this means to you, is that if you visit
a site, by clicking on a link in the post, we may make a commission based on
your purchase. The price you pay for the product or service is not higher, and
the commissions we earn help keep this blog, its tutorials and hosted
Silhouette crafting events possible. Thank you for supporting our efforts!
No comments:
Post a Comment
Thanks for stopping by. I would love to hear from you. Also, please feel free to suggest anycrafting projects or tutorials you would like to see in upcoming blogs.