Creating Customized Family Names Knock Out Style

I have a project that great for housewarming gifts, wedding gifts, shower gifts, etc that recipients are awed by and just love! So, let's get started. 

I'm using Silhouette Studio software for this project. It is one of the strongest but underpromoted designing software available. You can use the free basic version for this project, but you get more bang for your buck with the Designer version of the software. It's a one time fee for this version between $29 and $49...no monthly or yearly renewal. It's worth it's weight in gold. 

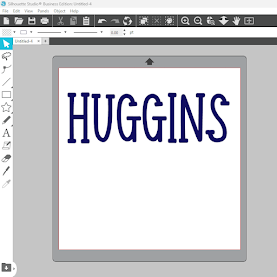
First thing I'm going to do, using BFC Garden Tomato font that I got from the Silhouette Design Store. I'm going to type out the family's last name, all in capitals, and size it accordingly. It is a little thinner than I like, so I'm going to offset it by 0.080 to fatten it up a little but still keep the characteristics of it. Then, I delete the original name. I add fill color to my fonts to make them easier to see and it helps me get a better picture of what my finished design is going to look like


Next we have to pick a font for the different family member's names. Since I've used a sans serif font for the last name, I'll be picking a simple script font for each family member's name. I chose Autunn Vintage and got this font from CreativeFabrica. I typed the names together with a space between each and did it in lower case. I just like the way it looks against the capital letters of the last name. I add fill color to the font. 


I then place the font over the top of the last name and use the align tool to align the names centered, vertically and horizontally with the last name. Although it looks great. The names don't stand out and make them hard to see. So...this is where "knock out" technique comes into play. We are going to add space and take it away from the last name so that you can better see the family member names. 


You' are now going to put an offset around the family name. The offset I used was 0.075. I think it is just enough to give the names pop but not take away too much of the last name so you won't be able to read it. I've colored the offset in red and grouped the offset together. I then pulled the family names away from both the offset and the last name. 


Now we select both the last name and the offset. We choose the subtract all tool (found in the modify panel). You won't initially be able to tell anything happened, until you pull away the offset. We don't need the offset anymore, so I'm just going to delete it. 


Now move your family names back over the last name. You'll see that it fits like a puzzle.


Now I'm going to add their establish date on the bottom. Now my design is ready to cut. 


And here's the reveal of my finished project. What do you think? 


Thanks for stopping by. I hope you found this tutorial helpful. Please feel free to contact me if you have any questions or need additional information.
If you like this post, please share it with a crafty friend and please share it on Pinterest, so others can find it. If you are on Facebook, I would love for you to check out my page and join my crafting Facebook group! In the FB group I like to share freebies, tutorials, and help with troubleshooting, etc. The group's members are super nice and like-minded. We all really enjoy fellowship and crafting fun. Hope to see you there! 

Until the next time we meet. Happy Crafting!

Julie πŸ’• 

This post may contain affiliate advertising. What this means to you, is that if you visit a site, by clicking on a link in the post, we may make a commission based on your purchase. The price you pay for the product or service is not higher, and the commissions we earn help keep this blog, its tutorials and hosted Silhouette crafting events possible. Thank you for supporting our efforts!

 Newly Released Artesprix Acrylic Sublimation Paints 

From This..........                                                                To This! 


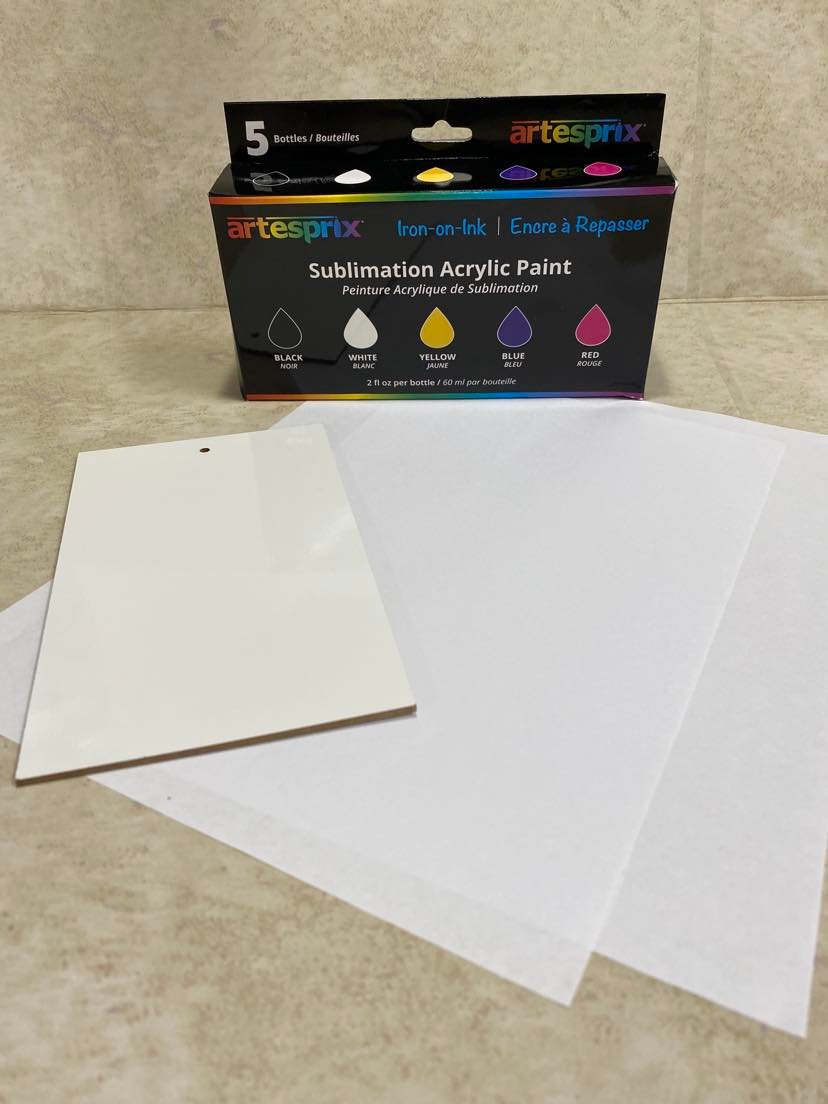
So I when I received these new Artesprix Acrylic Sublimation Paints, I'll be honest to say that I was a little skeptical. I honestly didn't really know what to expect. Man am I amazed! This project was just a little simple try out, so I did nothing elaborate with the product. But this one simple project turned out so cool, that now my mind is reeling with ideas for some new projects! Dislaimer ** You do not need a Glowforge or any laser machine to get similar results - just use premade sublimation blanks!**

Let's get started on this easy but stunning project! 

Supply List

First don't be like me (although it worked out to my favor) - go ahead and preheat your heatpress or iron to the temperature designed for your sublimation substrate. In my case I'm using a dry erase sign from DollarTree. I found it in the crafting section. I set my heatpress to 400 degrees and my timer to 60 seconds. 

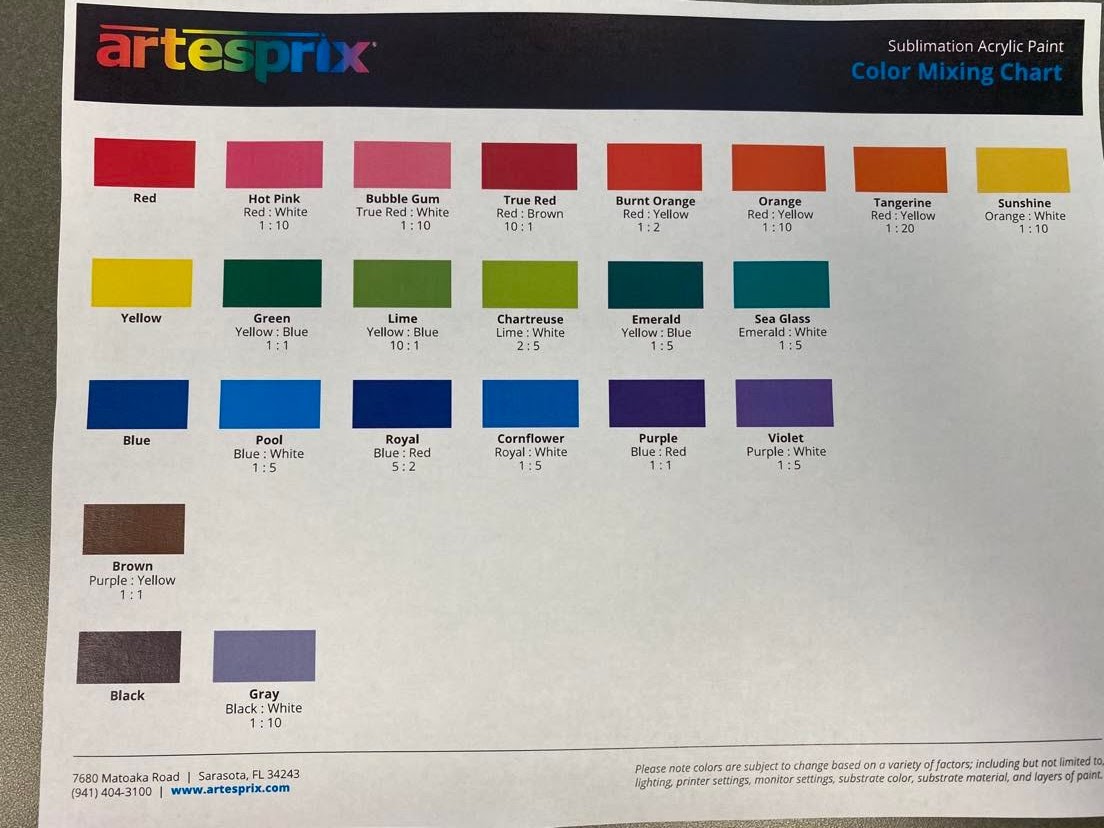
Next I wanted to change the colors a little. Artesprix Acrylic Sublimation Paints come in 5 primary colors. Black, White, Yellow, Blue and Red. They offer a color chart for mixing your own color combinations. 


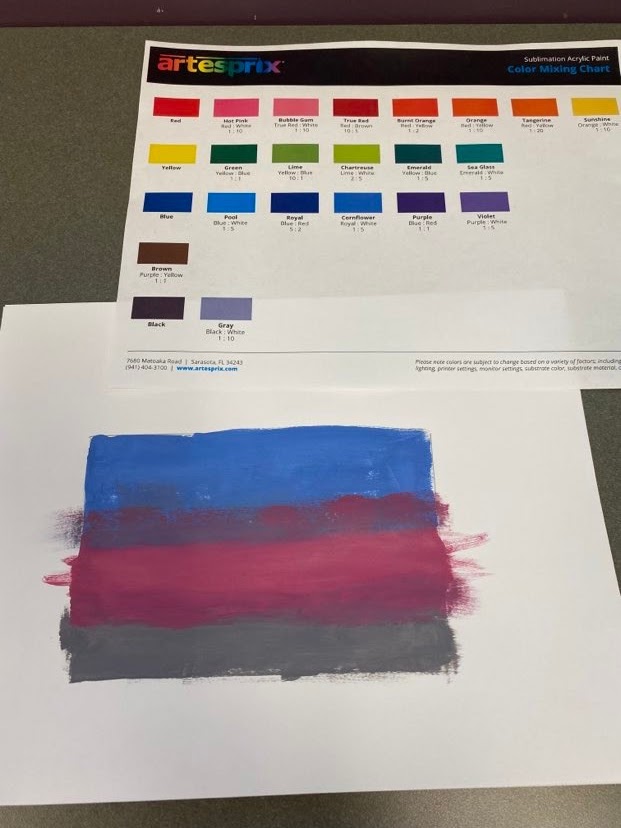
Using a pencil and white copy paper, I measure out a rectangle. I didn't do anything special. I just wanted to have a box similar to the size of my dry erase board. I then used my paintbrushes and painted the area in three random stripes. As you can see there was nothing special to my technique and I even had colors overlapping. That's the beauty of the finished product. You don't have to be an artist to get amazing results. It dried rather quickly. Within about 10 minutes it was dry to the touch. I did let it sit about 30 minutes total. Not on purpose but because I had forgotten to turn my heatpress on. πŸ™ˆ 

My next step was to place my painted sublimation design face down on my substrate. Then I taped them together face to face with heat resistent tape. 

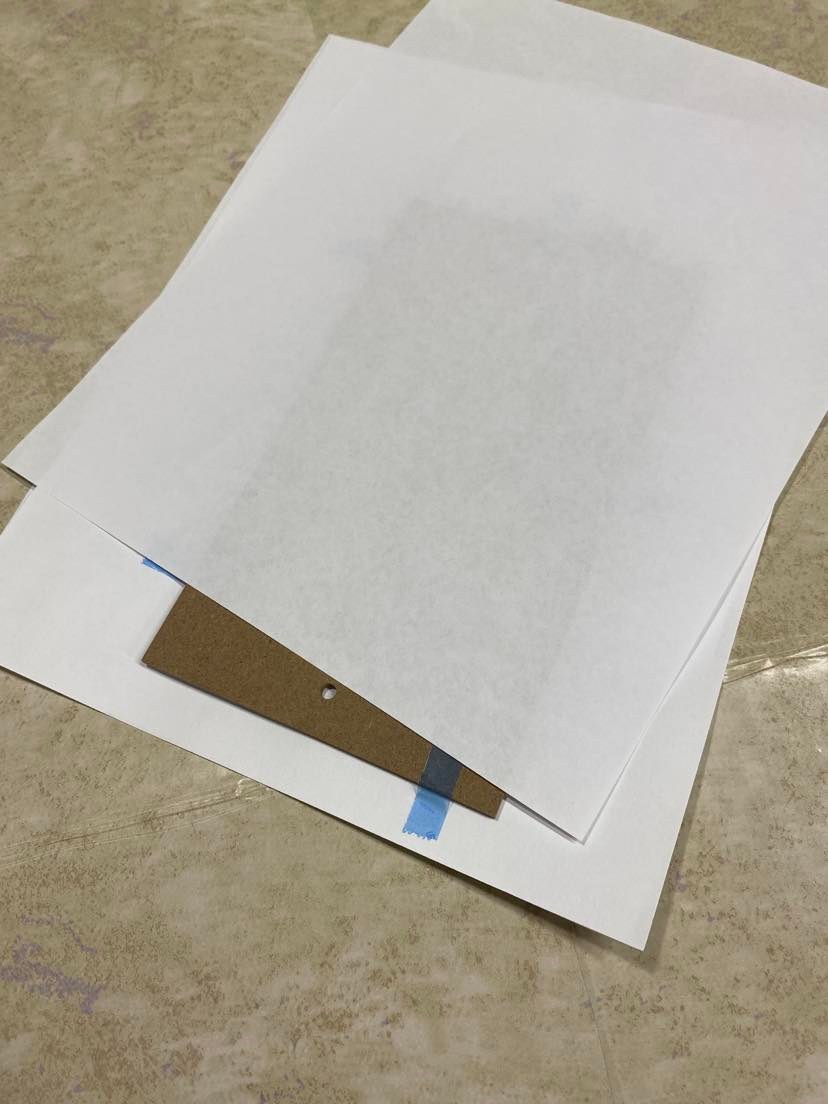
Next I sandwiched my design and substrate between 2 sheets of copy paper and sandwiched those between two sheets of parchement paper and placed them in my heatpress and pressed this project at 400 degrees for 60 seconds. Pictures show that process and then why you need to sandwich between the copypaper. It keeps the sublimation gases from getting into your bottom foam platen and top platen of your heatpress and transferring onto other projects.
                                                                                                                 

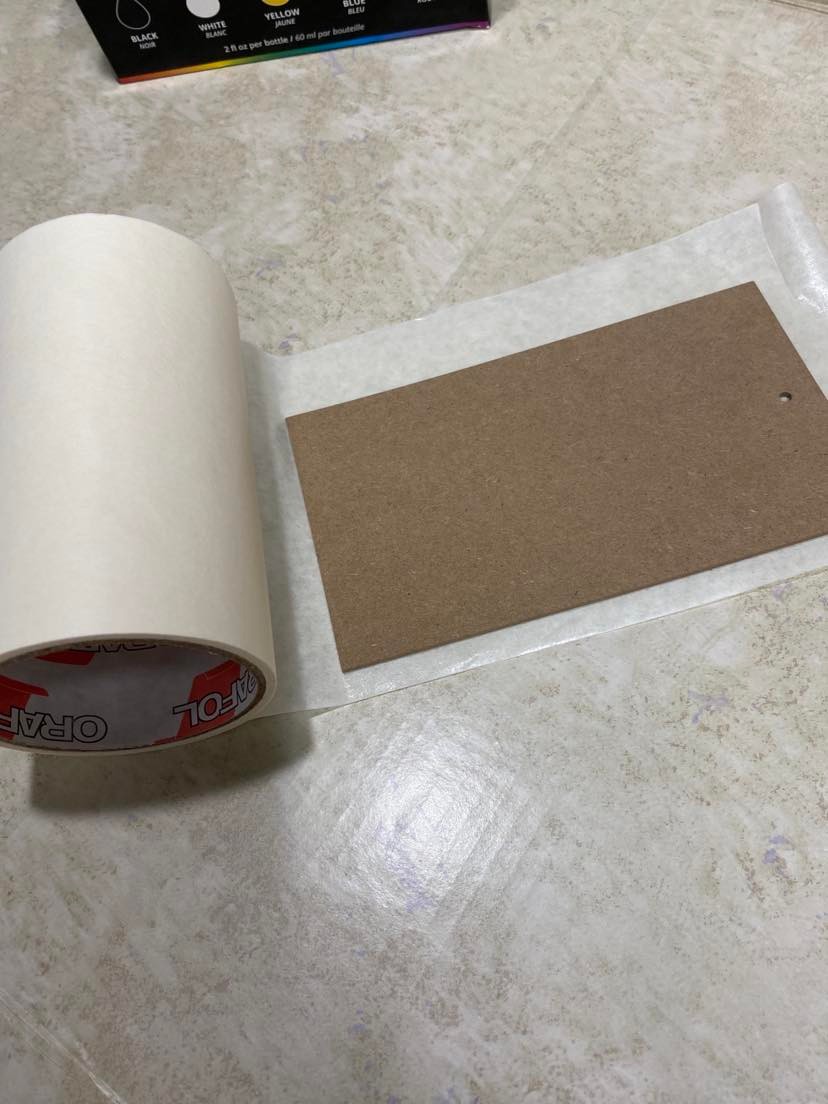
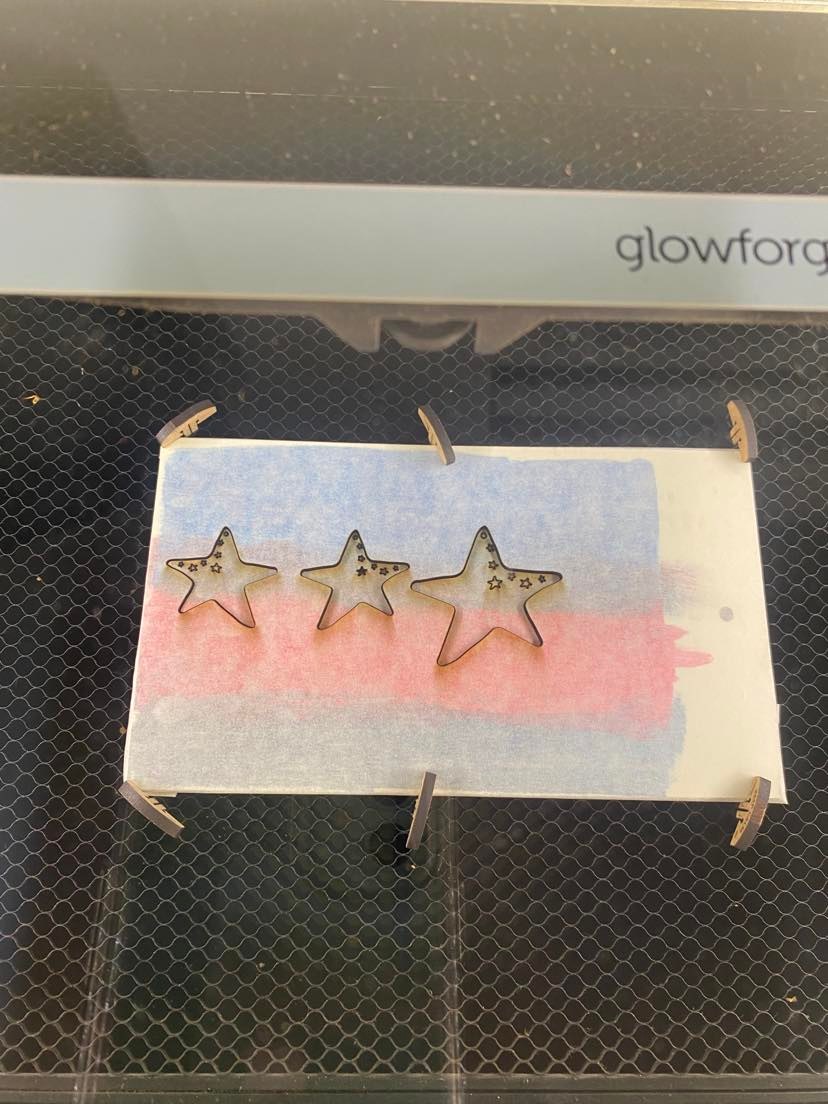
Once my project cooled I masked it with paper transfer tape and got it ready for my laser. I brought my design into my Glowforge laser software and cut out the design.  
I removed the masking from my pieces and here's how they turned out! πŸ’“
I added jewelry fixings and magically my pieces turned into this amazing patriotic set! Can you see why I'm so dazzled by Artesprix Acrylic Sublimation Paints?


Thanks for stopping by. I hope you found this tutorial helpful. Please feel free to contact me if you have any questions or need additional information.

If you like this post, please share it with a crafty friend and please share it on Pinterest, so others can find it. If you are on Facebook, I would love for you to check out my page and join my crafting facebook group! In the FB group I like to share freebies, tutorials, and help with troubleshooting, etc. The group's members are super nice and like minded. We all really enjoy fellowing and crafting fun. Hope to see you there! 

Until the next time we meet. Happy Crafting!

Julie πŸ’•


This post may contain affiliate advertising. What this means to you, is that if you visit a site, by clicking on a link in the post, we may make a commission based on your purchase. The price you pay for the product or service is not higher, and the commissions we earn help keep this blog, its tutorials and hosted Silhouette crafting events possible. Thank you for supporting our efforts!


Creating Customized Specialty Fonts

Have you ever really liked elements of a design, like a specialty font, but the wording just didn''t fit your tastes? Let me show you how to make custom lettering yourself.

The inspiration for this tutorial was found on Etsy. The font pictured below is half leopard print / half solid-colored font. If you've recently been on Etsy or DesignBundles, I'm sure you've seen something similar. This is a quite popular design element and there are several variations available. With a little help from the Silhouette Studio software, you can easily use any pattern you like and create a fun, one of a kind customized font. 


Let’s get started.

--First choose the font you want to use and type out the words you want to use. Here I have chosen the word CRAFT. The font I’m using for this example is Arial.


--Next using the knife tool, making sure it is set to solid line and straight, cut each letter in half. Remember if you hold your shift key down when using the tool it will cut in either direction, in a straight line and not on an angle.


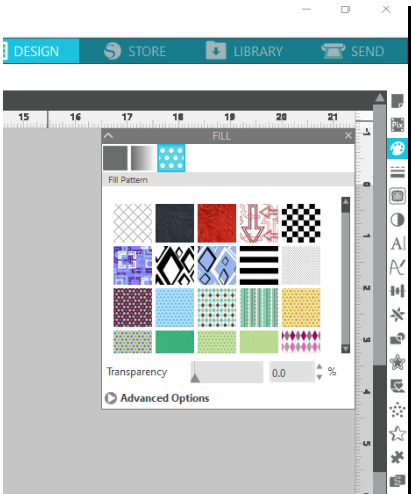
--Once you have each letter cut, you will want to start filling in the pieces with your fill pattern and solid color(s). Solid color fills and pattern fills can be found in the Fill Panel (right hand side of software screen 3rd icon down) – first and third tabs within the panel.


--Now choose a fill pattern and begin filling the letter pieces with the pattern. If you do not have a pattern you want to use, then you will need to acquire a pattern and import it into the patterns folder in the library within the Studio software. I got mine from DesignBundles. You can grab it here.


--Then choose a solid color you want to use and fill the remainder of the pieces with this solid color(s).  


--Once all your letter pieces are filled in, decide if you will be printing this design out for use as a sublimation transfer or another printable product. If this is what you are planning to do with your design, change your line color to no color. This option can be found in the Line Style Panel (right hand side of software screen 4th icon down / Line color - 2nd tab). By default, the lines are colored red to represent cut lines and will print red if the line color is left as the default.

If you are not going to be printing the design and plan to use heat transfer vinyl (HTV) or another media that will be cut, leave your line color as is.


--Now you are ready to either print your design or cut your design out of HTV or another media. Before printing or cutting, make sure that all letter parts are touching appropriately with no gaps. Make sure to group them together before sizing / etc., to ensure that pieces do not get bumped out of line, have unwanted spacing, etc.

If you are ready to print your design – Hit the print icon and chose your printer of choice.


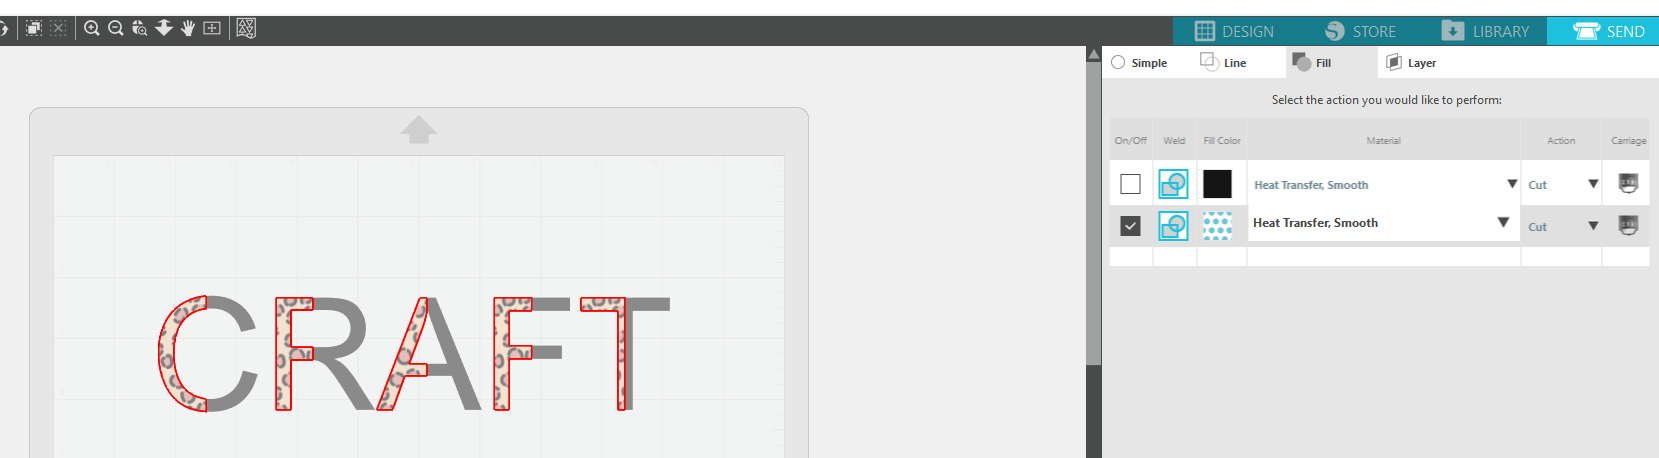
--If you are going to cut your design from HTV or another media – place your material choice for the pattern pieces on the mat securely and load your mat accordingly. Choose the Send Panel – 4th icon top of software screen. Then chose Fill tab (3rd tab choice) to cut the design by the pattern & solid.


--In order to cut just the pattern pieces, you will need to uncheck the 1st box (solid color) and double check that you have chosen the type of media you are utilizing, as well as type of blade installed in the tool carriage from the pull-down menus. You will notice that the pattern pieces on the screen will have a red line around them. Now hit the send button. Your design should begin cutting. Once the cutting of this part of the design has completed, remove your media from the mat.


--Place your solid HTV or other media choice for the remaining pieces on your mat securely and load your mat accordingly. Now you will check the first box and uncheck the 2nd box. Again, make sure that the correct material is chosen from the pull-down menu as well as the type of blade you are using. You will now notice that there should be black lines around the solid-colored pieces on the screen. (Your lines around the solid-colored pieces will be whatever color you filled those pieces in with.)  


Now hit the send button again. Once your design has completed cutting, you are ready to press your design accordingly.

Guess what??!! You just created your own customized lettering!


Thanks for stopping by. I hope you found this tutorial helpful. Please feel free to contact me if you have any questions or need additional information.

If you like this post, please share it with a crafty friend and please share it on Pinterest, so others can find it. If you are on Facebook, I would love for you to check out my page and join my facebook group! In the FB group I like to share freebies, tutorials, and help with troubleshooting, etc. The group's members are super nice and like minded. We all really enjoy fellowing and crafting fun. Hope to see you there! 

Until the next time we meet. Happy Crafting!

Julie πŸ’•


This post may contain affiliate advertising. What this means to you, is that if you visit a site, by clicking on a link in the post, we may make a commission based on your purchase. The price you pay for the product or service is not higher, and the commissions we earn help keep this blog, its tutorials and hosted Silhouette crafting events possible. Thank you for supporting our efforts!


Reverse Canvas - Tutorial

Hi friends! Just wanted to drop in and chat a sec. I know it's been a while. Life just wants to get in the way. I'd much rather be here chatting and crafting with you! πŸ₯°

I've had a lot of people asking me about my reverse canvas projects that I've shown in my facebook group and have taught at different events. Someone asked if I could put together a tutorial for it. So for now, what I thought I would do is include a video tutorial I did a while back for my FB group. Please excuse it....I'm a work in progress and I don't know about you, but I do not like seeing myself on camera. I'm trying to overcome my camera fears, but it makes me so uncomfortable. Ughugh!! I would much rather do it in person. 😁


I hope you find it helpful. Please feel free to contact me if you have any questions or need additional information.

If you are on Facebook, I would love for you to check out my page and join my facebook group! In this group I like to share freebies, tutorials, troubleshooting, etc. The members are all so nice and everyone is uplifting and helpful. 

So until the next time we meet, as always, Happy Crafting! 
JulieπŸ’•

Customized Gift Wrap & Matching Tag

There is just so much you can do with your Silhouette software & machine. The ideas are endless. You just have to think outside the box a little bit. So...what happens when you add a printer, some Ikea rolled art paper & cardstock? You can create a customized gift wrap for someone special!
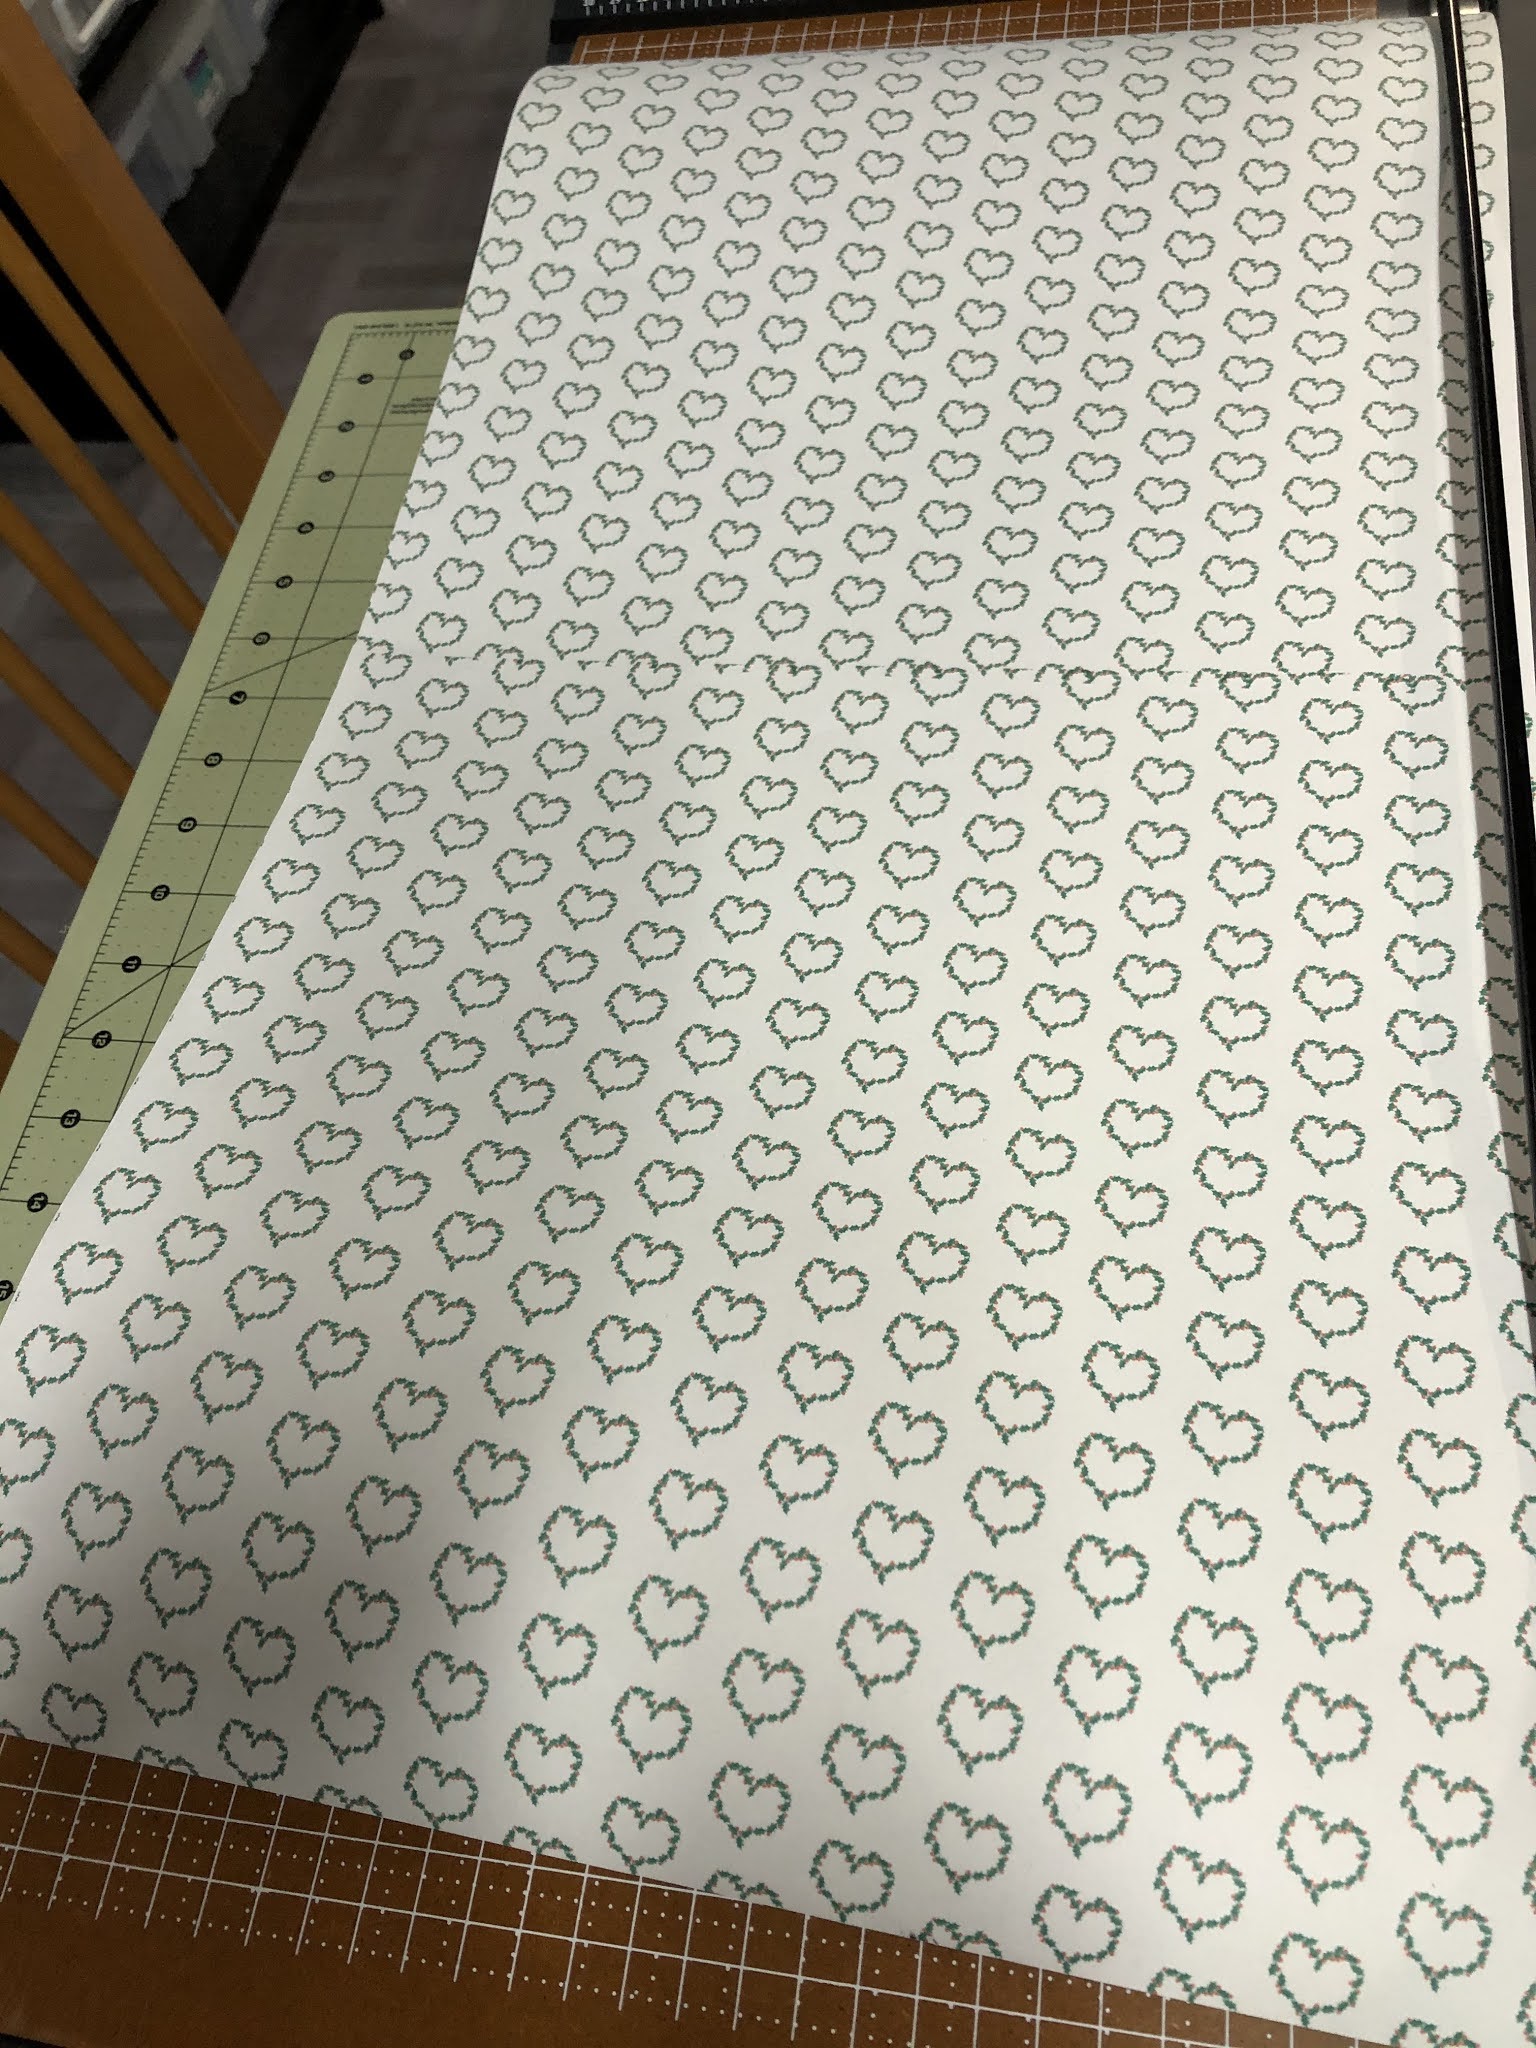
Anyone can do this with the Silhouette Studio software, Silhouette Cameo, your home printer and some ribbon. Here's how I did it: First I cut a piece of the Ikea rolled art paper 12 inches by 24 inches. Next, I got this adorable Christmas Holly Heart paper pattern #166168 by designer Sandi Idelman in the Silhouette Design Store and printed it onto the paper directly to my home printer from Silhouette Studio.
Once the paper was all printed out, I enlarged the pattern and isolated the design in the software by cropping it with a heart image made with the flexishape panel. I wanted to use as this as my matching tag.
Once I had my design the way I wanted, I printed it out on cardstock as a print and cut design with registration marks for no fail cutting. Once printed, I cut the tags with the help of my trusty Cameo.
Lastly I wrapped my package, added the ribbon and tied on my card! It was that simple. And Viola! Customized Wrapping! Now, I challenge you to see what you can create!

Crafting Unity During The Coronavirus

Hi there and thanks for stopping by. Yes, I have been MIA. You know how things go...that little thing called life just seems to get in the way. Intentions are good, but sometimes I just can't get it all done.

Praying you and your family are safe and healthy with all that is going on in our big worlds.

Here's a little update from my neck of the woods. My youngest son is off at school still living the college life (those quarantined & virtually learning). My oldest son & his wife started out the year shaking our foundation by moving across the country to the west coast. Yep 3,000 miles away. That was unexpected to say the least. But I guess children grow up and make their own way.

All the while, the rest of our world as we know it was getting rocked with the Coronavirus. Luckily, the area where we live hasn't been hit very hard, but unfortunately we know several who have been impacted by it. Our prayers continue to go out to everyone affected. Although my husband and I are essential workers, we too are living our days under shelter in place. We of course have to go to work. But we don't do much else other than hitting the grocery store for essential needs. Although I know this whole thing has been inconvenient to life as we all know it, I also hope it has been an eye opening experience just as it has been for us. It seems to be bringing families back together and strengthening the family unit. (There's probably a few frazzled parents out there questioning me on that comment - and to those parents I say this...makes you appreciate those teachers just a little more now, doesn't it! πŸ˜‚πŸ’—) And honestly, both are something this country definitely needed. πŸ’—

It also has brought the nation together. People of all walks of life helping their fellow man. Crafters and non crafters making face masks and other needed supplies for healthcare workers and first line responders. Some others are making and sending uplifting cards and many others are sharing these stories. Strangers caring for and comforting each other. That, right there my friends, is worth its weight in gold. I've had the honor of witnessing several of these wonderful selfless acts around me and wanted to share a few of them with you.

My friend Starlin, who is a local photographer, put down her camera and began sewing masks to donate to healthcare workers. She also used her Silhouette Cameo for cutting out leather mask clips.
                        

Another friend and fellow colleague, Silhouette Instructor Teresa Pepe from New York, used her Silhouette to make face shields and began donating them to her local hospitals & front line workers. She and her family have worked around the clock to fill requests. Word of what she was doing spread like wildfire and many were moved by her story. As a result, she started receiving supply donations from both businesses and the community. This made it possible for she and her family to continue making the face shields. Her story also inspired other Silhouette instructors to support her cause. Teresa has received multiple boxes of face shields made by these colleagues. These face shields have been donated to local first line responders.  
           

Lycia (my sister from another mother) and her sweet mom Nancilee, both from Texas, also took to crafting to fill needs in their community. Lycia, who is also a Silhouette Instructor, used her Glowforge to craft acrylic buttons for headbands and mask clips from plexiglass. Both of these items were designed for healthcare workers to relieve the pressure of mask loops off their ears. Nancilee and her quilting group took to their sewing machines and together sewed thousands of face masks for their local hospital.


There are so many heartwarming stories happening around me, that I of course can't begin to tell them all. I'm in awe of these and the countless others that are happening day in and day out. Please don't let the storytelling stop here. Take to social media and spread the word of the good things you see happening around you. Things that are uniting our communities. Don't let goodwill go unnoticed!

And now I want to leave you with this last thought and maybe a little chuckle...okay... at least a smile on your face..Someone is going to have to come up with a post quarantine workout program for me when this is all over with, because I know I'm going to have the Corona25 when it's all said and done, if you know what I mean...well Corona quarantine and that cookie dough and well maybe that strawberry ice cream all will have contributed...and I really didn't need any additional help...I already looked like a busted can of biscuits...I'm just sayin' πŸ˜‚.

Until next time stay safe, healthy & wash your hands! πŸ’§πŸ˜·

Hugs & Happy Crafting!
Julie
If you like this post please share it with a crafty friend or share it on Pinterest. Make sure to check out my FB page too!